Resources
JSON Form Definition
The form defined in this walkthrough is called “Secret Ballot Form”. This form consists of two input fields, as well as a hidden metadata field that collects the data collectors device ID. Since instances of this form are to be encrypted on the data collector’s device as well as on the server, a public cryptographic key must be attached to the form. The slides in this section cover all of the above.
The technical parameters that describe the input screen for the form being defined are delineated below:
- Email Input Screen: This screen is of “Text Input” type. It rejects all entries that are not consistent with the format of email addresses.
- Vote Points Input Screen: This is an “Integer input” type. It restricts its entries to integers in the range of 10 - 100 and ensures that any entry is a multiple of 10.
- Metadata: The form is designed to collect the following “Device ID” metadata. Metadata is automatically collected.
- The “SecretKeys.public” cryptographic key file is also attached to the form.
See here for the many input screen types available.
Note that the CCA Desktop app is required for this exercise.
Slide 1
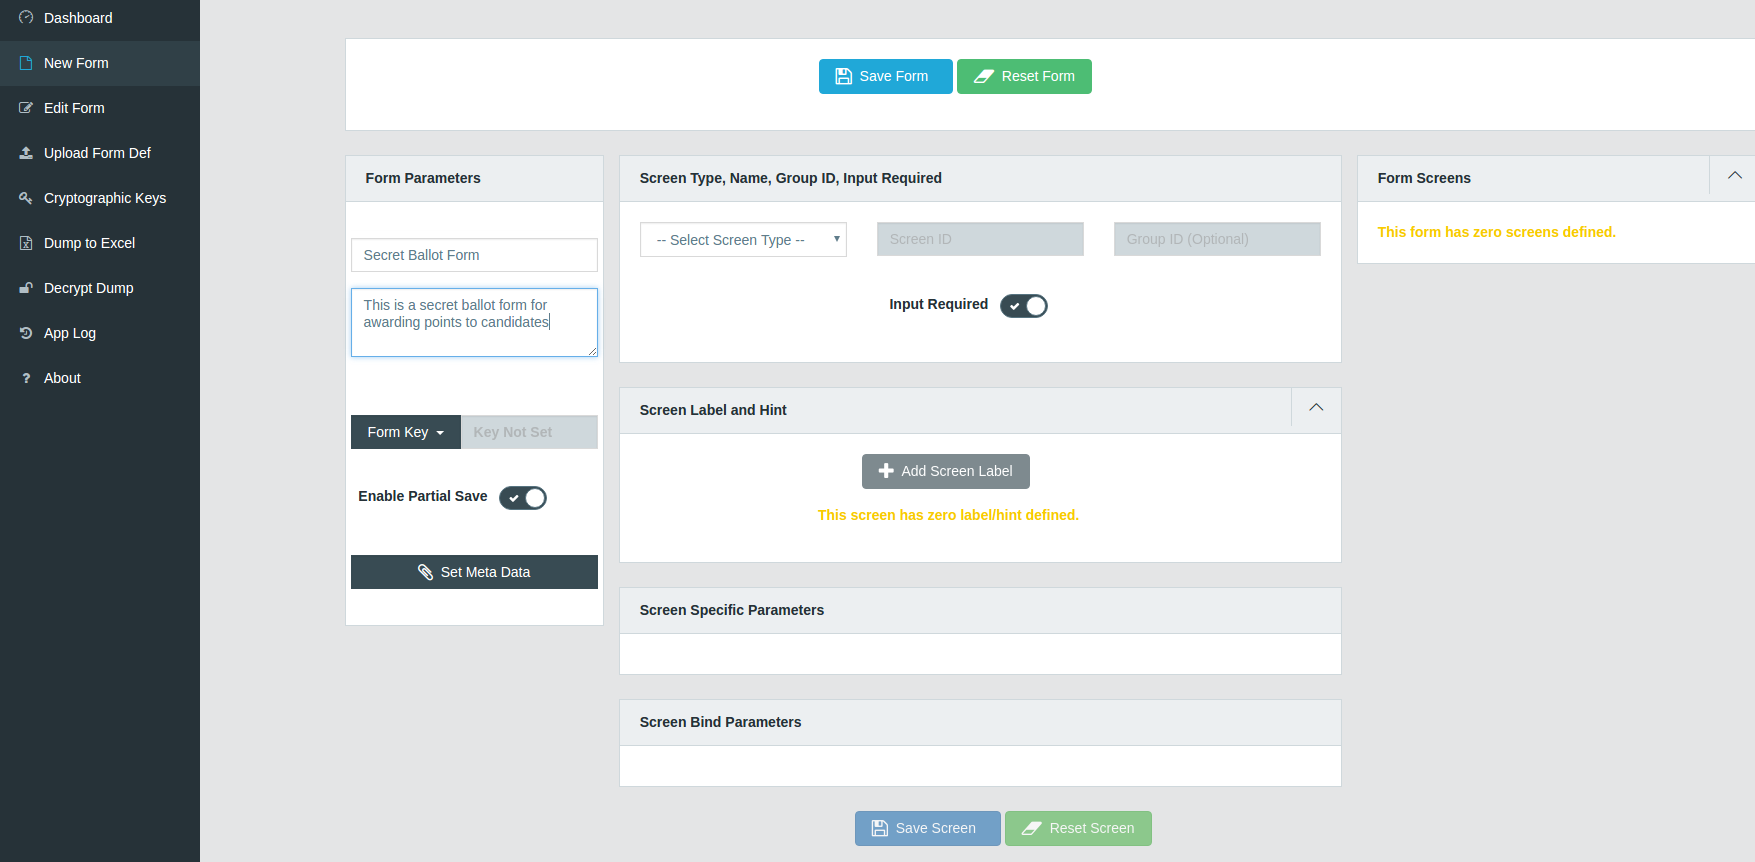
(1) Start the CCA Desktop app.
(2) Click the New Form menu on the left hand side of the screen.
(3) Type "Secret Ballot Form" into the form name prompt as shown in the image above.
(4) Type "This is a secret ballot form for awarding points to candidates" into the form description prompt as shown in the image above.
(5) Leave the Enable Partial Save box checked. Checking this box allows partially filled forms to be saved and completed at a later time during data collection.
(6) Continue on the next slide.
Slide 2

(1) Under the Form Key action button, click the Set Encryption Key link.
(2) Upload the public key half of the key pair generated earlier i.e., SecretKeys.public.
(3) Continue on the next slide.
Slide 3

(1) Click the Set Metadata button.
(2) Check the metadata items as shown in the image above.
(3) Click the Save button.
(4) Continue on the next slide.
Slide 4

(1) Select Text Input in the Select Screen Type dropdown box.
(2) Enter "Email" into the Screen ID textbox as shown in the image above.
(3) Leave the Input Required box checked.
(4) Click the Add Screen Label button.
(5) Choose English in the Select Language dropdown box shown.
(6) Enter "1. Please enter the candidate’s email address here." into the screen label prompt. Enter "Enter Only validly formatted emails will be accepted." into the screen hint prompt.
(7) Click the Save and Close button.
(9) Enter "^[A-Z0-9a-z._%+-]+@[A-Za-z0-9.-]+\.[A-Za-z]{2,6}$" into the RegEx (Optional) textbox prompt as highlighted in the image above.
(10) In the Max Time (Optional) prompt select 17:00.
(11) Click the Save Screen button at the bottom of your screen.
(12) Continue on the next slide.
Slide 5

(1) Select Integer Input in the Select Screen Type dropdown box.
(2) Enter "Vote Points" into the Screen ID textbox as shown in the image above.
(3) Leave the Input Required box checked.
(4) Click the Add Screen Label button.
(5) Choose English in the Select Language dropdown box shown.
(6) Enter "2. Please enter the vote points for the candidate here." into the screen label prompt. Type "Enter a number which is a multiple of 10 and between 10 and 100." into the screen hint prompt.
(7) Click the Save and Close button.
(8) In the Min Value (Optional) prompt enter 10.
(9) In the Max Value (Optional) prompt enter 100.
(10) In the Multiple Of (Optional) prompt enter 10.
(11) Click the Save Screen button at the bottom of your screen.
(12) Continue on the next slide.
Slide 6

(1) The new form screen should be similar to what is shown in the image above. Notice both form screens defined on the right.
(2) Click the Save Form button highlighted in the image above to save this form.
(3) Note that this form can be edited by clicking the Edit Form menu.
(4) This lesson is now complete.